


Drain Saddles for Home RO Systems

![]()
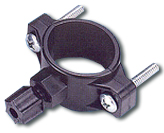
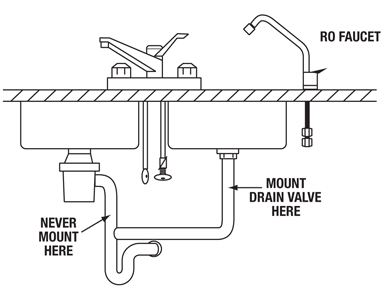
Used to connect reject line of point of use RO system to the sink drain line. The clamp style body will fit drain pipes up to 1-½” diameter and should be installed between the sink basin and the trap.
Available with two styles of tube connection: quick connect (QC) or male threaded with compression nut.
Purchase Now » Request A Quote »Benefits
Benefits of AMI Drain Saddles for Home RO
- Provides leak-free connection to the sink drain for RO waste water.
- Compatible with all RO systems using ¼” tubing.
- Available in male threaded with compression nut, or quick connect styles.
Details
Request A Quote »
Drain Saddles Ordering Information
|
Model No. |
Tubing Connection |
Color |
|
H-D3000QC |
¼” Quick Connect |
White |
|
H-D3000M |
¼” Male Nut |
Black |
H-D3000QC |
H-D3000M |

Features
Residential Drain Saddles Features
- Includes Clamp, Nuts & Bolts for Closure, Sealing Pad and Compression Nut or QC for Tubing Connection
- Requires a hole to be drilled in the drain line before installation
Applications
Applications for Drain Saddles
- Point of Use (POU) Drinking Water Systems
- Home RO Systems
- Counter Top Water Filters
- Institutions
- Lab
- Water Purification
Contact us
for a quote or for any additional information
or call us at 1.800.321.9321